What is HHVM?
HipHop Virtual Machine (HHVM) is a virtual machine developed and open sourced by Facebook to process and execute programs and scripts written in PHP. Facebook developed HHVM because the regular Zend+Apache combination isn't as efficient to serve large applications built in PHP.
According to their website, HHVM has realized over a 9x increase in web request throughput and over a 5x reduction in memory consumption for Facebook compared with the Zend PHP engine + APC(which is the current way of hosting a large majority of PHP applications).
Installing HHVM
Installing HHVM is quite straightforward and shouldn't take more than a few minutes.
Ubuntu 13.10
wget -O - http://dl.hhvm.com/conf/hhvm.gpg.key | apt-key add -
echo deb http://dl.hhvm.com/ubuntu saucy main | tee /etc/apt/sources.list.d/hhvm.list
apt-get update
apt-get install hhvm
Ubuntu 14.04
sudo apt-get install software-properties-common
sudo apt-key adv --recv-keys --keyserver hkp://keyserver.ubuntu.com:80 0x5a16e7281be7a449
sudo add-apt-repository 'deb http://dl.hhvm.com/ubuntu trusty main'
sudo apt-get update
sudo apt-get install hhvm
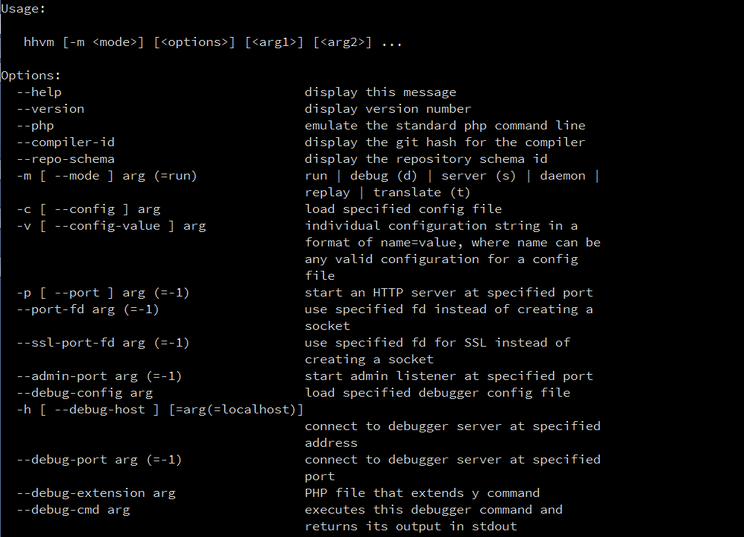
To confirm that HHVM has been installed, type the following command:
hhvm -help
This will show details of how the hhvm command can be used from the command line.
Here is a sample screenshot that illustrates this:

Test a 'Hello World' script in PHP From the Command Line using HHVM
Type the following command on the command line:
cat > hello_world.php
This will create a file named hello_world.php and allow you to enter its contents
Type in(or copy and paste) the following code and then press Ctrl + D to save the file.
<?php
echo "\nHello World\n\n";
Note: If you are familiar with editors like nano or vim, you can use those to create and save this file.
Once this file has been created, hhvm can be used to execute it using the following command:
hhvm hello_world.php
Using HHVM in the FastCGI Mode
Starting with version 3.0, HHVM can no longer be used in the server mode. This section will help you configure HHVM in the FastCGI mode with the Apache and Nginx servers.
With Apache
Configuring HHVM to work in the FastCGI mode with Apache is extremely simple. All you need to do is execute the following following script:
/usr/share/hhvm/install_fastcgi.sh
Running this script configures Apache to start using HHVM to process the PHP code. It'll also restart the Apache server so you don't have to do anything else.
You have to enable mod_proxy, mod_proxy_fcgi modules, then in your Apache configuration.
With Nginx
If you are using Nginx with PHP-FPM, you'll have to modify the configuration file
to disable the use of PHP-FPM. This file is normally located at /etc/nginx/sites-available/default.
Look for the following section and make sure it's all commented (by adding a # at the beginning of each line)
# pass the PHP scripts to FastCGI server listening on 127.0.0.1:9000
#
#location ~ \.php$ {
#       fastcgi_split_path_info ^(.+\.php)(/.+)$;
#       # NOTE: You should have "cgi.fix_pathinfo = 0;" in php.ini
#
#       # With php5-cgi alone:
#       fastcgi_pass 127.0.0.1:9000;
#       # With php5-fpm:
#       fastcgi_pass unix:/var/run/php5-fpm.sock;
#       fastcgi_index index.php;
#       include fastcgi_params;
#}
After doing this, execute the following script:
/usr/share/hhvm/install_fastcgi.sh
Executing this script configures Nginx to start using HHVM to process the PHP code. It'll also restart the Nginx server so you don't have to do anything else.
Confirming that Apache/Nginx is Using HHVM
After you have configured your server to start using HHVM, it's always a good idea to confirm that the server (Apache or Nginx) is indeed using HHVM to process PHP.
You can do this by creating a test PHP file, let's say info.php and putting it in the public folder
f your server (typically /var/www for Apache and /usr/share/nginx/html for Nginx).
Now put the following content in this file:
<?php

echo  defined('HHVM_VERSION')?'Using HHVM':'Not using HHVM';
Now if everything is set up fine, when you access this file in the browser, you should see the following message:
Using HHVM
Important Note
HHVM has incorporated a lot of commonly used PHP extensions, making it easy to port a large number of applications without much fuss. However, if an application uses a PHP extension that hasn't been incorporated yet, choosing HHVM will break the application. The complete list of PHP extensions that have been ported over to HHVM can be found here